[4.1b] Soraka Guide - Be the star of the show!

Pros
- Good sustain
- Ok damage
- HUGE heals
- Team heals
- Brainless
- Cheap
Cons
- Technical
- Weak to burst
- Immobile out of passive
Soraka Build
Best Build Guide for Soraka


Item Build Description
Additional information on the items
I use this item load out, in this order, almost exclusively. It just provides so much sustain that in favorable matchups it's possible (highly improbable, but possible) to not leave lane until mid game.
 Relic Shield
= self heal and gold (sell to get last item)
Relic Shield
= self heal and gold (sell to get last item)
 Catalyst of Aeons
= more self heal and mana help (upgraded before selling
Relic Shield
)
Catalyst of Aeons
= more self heal and mana help (upgraded before selling
Relic Shield
)
 Riftmaker
= this is where your damage ramps up assuming you're consistent with poke.
Riftmaker
= this is where your damage ramps up assuming you're consistent with poke.
 Harmonic Echo
= every so often healing teammates will heal extra targets, can include self.
Harmonic Echo
= every so often healing teammates will heal extra targets, can include self.
 Ionian Boots of Lucidity
= cool down
Ionian Boots of Lucidity
= cool down
 Awakened Soulstealer
= cd = more heals
Awakened Soulstealer
= cd = more heals
Upgrade catalyst to
 Rod of Ages
for even more self heal.
Rod of Ages
for even more self heal.
Last item can be just about anything, I included some of my favorites in order of consistency of procs. My preferred pick is
 Rylai's Crystal Scepter
as the slow makes the
Rylai's Crystal Scepter
as the slow makes the
 Equinox
root easier to hit.
Equinox
root easier to hit.
Finally Upgrade
Ionian Boots of Lucidity
with
 Redeeming Enchant
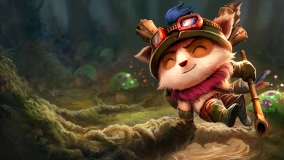
Boots can be built/upgraded earlier if you're ahead. This is simply the latest (and most usual points) where I personally build them. There are a few instances where other enchantments are viable but more on that in matchups section. We will be playing early game as more of a drain tank or general annoyance like a
 Teemo
.
Teemo
.
Soraka Runes
Best Runes for Soraka


![]() Font of Life
will heal you and your adc if you focus the same target. This will happen naturally if you position correctly.
Font of Life
will heal you and your adc if you focus the same target. This will happen naturally if you position correctly.
![]() Scorch
will provide you with a bit of extra damage, but more importantly will proc
Scorch
will provide you with a bit of extra damage, but more importantly will proc
![]() Font of Life
if your adc is... Preoccupied. There's also a neat interaction between it and
Riftmaker
that results in more damage.
Font of Life
if your adc is... Preoccupied. There's also a neat interaction between it and
Riftmaker
that results in more damage.
![]() Second Wind
gives you some hp, always good when HP is spent on healing spells.
Second Wind
gives you some hp, always good when HP is spent on healing spells.
Preferred last rune is [transcendence] for cdr but it's not on this website. Maybe it's still too new to wild rift?
![]() Nimbus Cloak
is also viable here for the extra move speed it offers after casting. It makes early game easier, but falls off late game as most of your threats will be hyper mobile champs who can one shot you if you overstep.
Nimbus Cloak
is also viable here for the extra move speed it offers after casting. It makes early game easier, but falls off late game as most of your threats will be hyper mobile champs who can one shot you if you overstep.
![]() Sweet Tooth
decent if you're playing a tough matchup as it lets you get items faster, but highly situational.
Sweet Tooth
decent if you're playing a tough matchup as it lets you get items faster, but highly situational.
![]() Manaflow Band
is also ok in this slot, but generally less useful as
Catalyst of Aeons
/
Rod of Ages
help your mana situation drastically.
Manaflow Band
is also ok in this slot, but generally less useful as
Catalyst of Aeons
/
Rod of Ages
help your mana situation drastically.
Skill Order
How to distribute skill points


Summoner Spells
When to take which summoners


Combos
Learn how to maximize the champions potential


Only use this if your adc goes all in, or if your jungler is ganking. Being on 100% cool down is never good.
Short trade poke. Drop
 Starcall
as you walk forward, auto, and gtfo. Ideally
Starcall
won't land until after the auto does so you can retreat with more HP than you started with. Having
Starcall
as you walk forward, auto, and gtfo. Ideally
Starcall
won't land until after the auto does so you can retreat with more HP than you started with. Having
![]() Font of Life
ready when you drop
Starcall
causes you to heal twice. Once from
Starcall
and again from
Font of Life
ready when you drop
Starcall
causes you to heal twice. Once from
Starcall
and again from
![]() Font of Life
. Not your optimal combo for self healing tho.
Font of Life
. Not your optimal combo for self healing tho.
Short trade poking for champs who are ability reliant for damage. Try to have
![]() Font of Life
ready when going in to make the most of the rune as it's easiest to avoid damage (and therefore maximize your self healing) when you don't have to worry about the enemy
Font of Life
ready when going in to make the most of the rune as it's easiest to avoid damage (and therefore maximize your self healing) when you don't have to worry about the enemy
 Morgana
flash stun combing you.
Morgana
flash stun combing you.


Emergency team heal. If you have to use this strap yourself in for a tough game. Expect teamfights to be 100% reliant on what you're doing, where you're standing, your movement patterns... It's ivy league professor intellect time.
Burst damage combo. Use this if you have kill potential, or you/adc get dove on. Despite what your team has to say a kill for soraka is ALWAYS better than a kill for your enemies.
Soraka Matchups & Counters
Detailed information on how to play matchups and counters


Hold your silence for her
 Bullet Time
, avoid standing in the minion wave. Focus her first if she has a tanky support. Ignore her and target the enemy support if they're squishy.
Bullet Time
, avoid standing in the minion wave. Focus her first if she has a tanky support. Ignore her and target the enemy support if they're squishy.
 Arcane Shift
 Inferno Trigger
 Concussive Blows
 Glacial Fissure
 Enchanted Crystal Arrow
 Ranger's Focus
 Zenith Blade
 Solar Flare
 Shield Of Daybreak
 Whimsy
 Glitterlance
 Light Binding
 Grand Entrance
 Piercing Darkness
 Quicksilver Enchant
 Playful / Trickster
 Urchin Strike

Minions are trash.
Killing minions is fun, until someone takes an arrow to the knee. Then it's just another reason why good supports don't need money. I like my knees thank you.
Cs, creep score, minion kills... Whatever else you might call getting gold from pve aspects of the game aren't talked about much in the support community. People tend to focus on x stats for y gold efficiency, or how much a high rank account costs because that's cheaper than items in game... So let's talk
Relic Shield
.
Right off rip I'm going to throw out a hot take. Don't think of it as a quest. It's an optional minigame at best.
If you've read the cliff notes in the item section you'll know it grants bonus gold and a bit of healing on killing a minion provided it has a charge. So when should we be using this passive and when should we ignore it?
For obvious reasons we don't step forward for it when we don't have a minion wave of our own, or proper zone control. We also want to avoid using it if we're full HP, unless our adc is about to miss a cannon minion.
Mainly we want to use this on cannons, when we are close to 75% HP, but if you're low and in danger go ahead and get any random minion(s). It might save you, or at least stall for a more potent self heal to come off cooldown.
Early game we can use a few charges to crash wave and get a gold/xp lead but it's not advisable if your adc has decent waveclear.
In the event of facing a tough lane we instead want to hold 2 charges on average at any time. One specifically for cannon minion, and one for desperation self heal. The third try to use to catch any minions our adc will miss. If the enemy builds a large wave or hard pushes to force a dive angle burn all charges and focus on getting the minions back in line. Destroy the wave completely if you have to, it'll motivate the enemy to back up to about mid point of lane which gives you time to consider your resources and back if needed. Never stay if you feel you can't trade 1 for 1 or better.
If you get a massive lead, maybe a few early kills under your belt burn a charge on every cannon to maintain your lead ignoring all other minions
Most of the time this won't be the case, and you actually want to be two levels down on your adc because of xp loss due to warding runs. (Don't worry even tho this puts you a level down on the enemy your adc should be a level up on them due to solo xp and denying the enemy of their farm so you're winning lane.)
My latest soraka game looks like
11K damage
29K healing
8k damage taken per death
60% kill participation
19 seconds of cc applied to enemies
Kda 4/1/14
This was done on 12k gold. (We lost, but still and good example of how much can be done with no budget)
Early game
Starcall
into the lanebush closest the enemy t2 turret to draw out any cheesers and get it warded asap. From my experience your adc is probably waiting in your lanebush waiting to cheese/ward anyway so it's a good moment to test your player synergy. It's ok to trade some hp to ensure the ward goes untargetable as this is the only time we make sure there's a ward in this bush, for the rest of the game it's up to you to track the bush mentally or the adc to ward it.
From here it's your job to try pushing the enemy off the minions (unless it's a tough lane). We want to push as many waves under the enemy turret as we can, making sure to back (at least to your turret) the instant the enemy jungler stops being visible on the map. We repeat this until either we clear turret or our adc is a level up on the enemy. (Yes I've had several games where we take turret super early, and games where adc got ahead while I was on vision runs. These small pockets of solo xp add up quickly).
You call the shots in bot lane, ping for enemy missing, ping for your jungle to gank, ping enemy vision if you can't destroy it, ping for dragons, ping for your adc who just flash dove turret with 0 HP knowing full well master yi was coming for that booty because you did your job and pinged danger when yi left mid heading bot.
If a fight breaks out in river go, but don't step into enemy jungle. Your squishy behind doesn't belong there.
Once we're ahead we can slow down the pace a bit. If their turret is still up then continue to punish the enemy for stepping up to cs, and play for vision near the dragon pit and the entrance into enemy jungle that's between pit and bot lane. It's worth standing near the wall and dropping a ward over into their blue buff instead of warding pit if the enemy team is ap heavy. It can also be worth to ward the dead area to the bottom side of the opponents jungle entry from river and pop the vision plant if the enemy jungler is camping bot lane or suspiciously absent from map.
We save our
 Wish
for people currently in our lane. If your top laner, midlaner, or jungle are getting shat on elsewhere on the map it's not your problem. Don't waste your longest cooldown trying to save a doomed engage elsewhere or to try padding out your assist rate.
Wish
for people currently in our lane. If your top laner, midlaner, or jungle are getting shat on elsewhere on the map it's not your problem. Don't waste your longest cooldown trying to save a doomed engage elsewhere or to try padding out your assist rate.
Early v tough lane
If the enemy picks champions that are tough to deal with, or your player synergy is lacking any sense of the word synergy we want to play closer to turret. There's a gap in the jungle wall where tri bush sits, minions are not allowed past this point as they'll be in turret range, which puts you in danger of being dove. You don't step out of turret range without a friendly gank incoming or guaranteed kill/assist. Focus zoning the enemy off the minions. It's best to use
Starcall
if the enemy steps near/inside their minions so you can help prime them for your adc, or your
Relic Shield
while still getting poke in while we wait for our jungle to help. If survival is extremely difficult consider taking a second point of
 Astral Infusion
at level 4 then maxing
Equinox
as usual.
Astral Infusion
at level 4 then maxing
Equinox
as usual.
Ping your adc to get vision in the lanebush closest to your t2 tower.
Instead of warding pit and jng entrance we instead ward our red and drop a ward over wall from the back side of pit. This will give us vision of dragon without leaving us open to the enemy jungler collapsing on us.
Mid game
Enemy botlane t2 tower is down (or yours is) and you've made it to mid game. Typically this is the point where everyone arams mid. Here were going to change our play style yet again to avoid being overly predictable.
Now instead of being the front line for your adc you want to hover kinda between the back line and the front liners, unless the enemy is hyper mobile. If they are then hover behind the adc staying out of vision until an opportunity to collapse presents itself. A surprise silence/root into a full heal can be as demoralizing as seeing a Katerina pop over the wall for a pentakill just as baron spawns.
As a support it continues to be your job to get objective vision. I find it best to wait for ult to be up before going to ward, that way you can still be there for the team despite not physically being at the start of the fight. Do not blow
Wish
if one or two of your team gets caught out of position, save it for when the majority of your team needs a heal, their HP bars can conveniently be seen at the top left of your screen.
Remember tho, you're not just a heal bot. If you're not getting vision you should be constantly stepping up for poke everytime an enemy walks too far up. Try to use
Equinox
when it has the most potential to root, or cause general chaos for the enemy. It can even stop
Bullet Time
mid channel. The less you allow the enemy to use their kit the better.
By now you should have your
Harmonic Echo
and at least be started on
Awakened Soulstealer
so to make the most out of
Astral Infusion
wait for
Harmonic Echo
to be fully charged, land
Starcall
, and while you're healing from
Starcall
cast
Astral Infusion
. This will make
Astral Infusion
cost less HP to cast, as well as proc
Harmonic Echo
for extra healing that applies to your original target and up to 3 of their closest allies prioritizing lower hp values... And you can be one of these 3 extra targets.
Faq
Q: How is the healing so high?
A: it scales with ap, as does the bonus healing from most of our items.
Q: Why are we maxing
Equinox
first?
A: a lot of champions rely heavily on casting abilities, all champions like to move. Maxing
Equinox
means we can take these things away more often.
Q: looks like a healbot, Where's the damage at?
A:
Riftmaker
adds 3-9% increase to damage, and that additional damage becomes true damage at max stacks (something we try to maintain indefinitely). True damage adds up quickly with consistent poke.
![]() Scorch
also pulls it's weight here. Remember our champion isn't meant to do damage, so for it's class 11K damage is huge when compared to an adc's 22k damage. (Numbers pulled from one of my own matches)
Scorch
also pulls it's weight here. Remember our champion isn't meant to do damage, so for it's class 11K damage is huge when compared to an adc's 22k damage. (Numbers pulled from one of my own matches)
Late game
This is your time to shine, and sadly the part we all find boring about playing an enchanter. You'll still be looking for cheeky
Equinox
's but it's time to stand back and let your meat shields, I mean team, tank the damage while you focus on healing them up. Minimap awareness is vital here more than ever as elder dragon and baron spawn. You want to drop a ward over wall behind pit (or in enemy jungle routes depending on which side of the map your on/which obj is coming up) and toss an auto to pop the blastcone from relative safety. You'll be the last to show in a team fight to ensure any enemy dashes are down before you go in or you're going to be focused down instantly.

