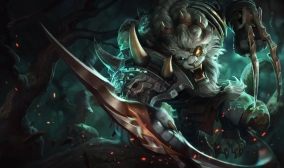
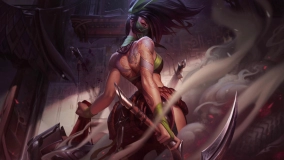
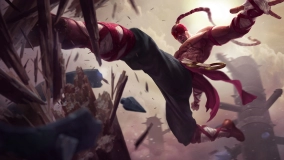
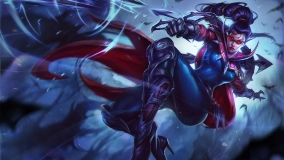
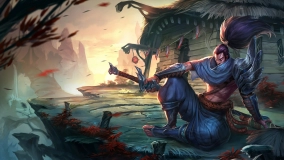
[2.3] Riven Guide - How to climb with RIVEN


How to climb with RIVEN
Pros
- Insane burst damage
- Crazy Mobility (Slippery)
- Beats most matchups
- No direct counter
- Easy First Blood
- Fits any team composition
Cons
- Ridiculous Skill Ceiling
- Horrible when behind
- Below average sustain (before deaths dance)
- Insane overconfidence (when ahead)
Riven Build
Best Build Guide for Riven


Item Build Description
Additional information on the items
Starting Items:
-
![Long Sword]() Long Sword
. More often than not, you will start out with long sword because it builds to your core items and this can really cheese your opponents (Q combo with auto-attacks can get enemies to 40% hp) if you're experienced.
Long Sword
. More often than not, you will start out with long sword because it builds to your core items and this can really cheese your opponents (Q combo with auto-attacks can get enemies to 40% hp) if you're experienced. -
![Cloth Armor]() Cloth Armor
. if you're not experienced or against a hard match-up (eg
Cloth Armor
. if you're not experienced or against a hard match-up (eg
![Darius]() Darius
or
Darius
or
![Vayne]() Vayne
) then you can start with a cloth armor.
Vayne
) then you can start with a cloth armor.
 Long Sword
 Cloth Armor
 Vayne
Vayne
First Back:
Your first back is where you get your "Powerspike" items, and it's crucial that you get these items to start stomping. Although, not all games goes the same way, sometimes you're behind. sometimes you're ahead. I will list down the items to get depending on your lead of the game.
If Balanced
-
![Phage]() Phage
. Usually your first buy if you have a balanced lane match-up. It gives amazing early stats (15 AD and 175 HP) and also an increased of movement speed after an auto attack to stick close to your enemies whilst doing your combo.
Phage
. Usually your first buy if you have a balanced lane match-up. It gives amazing early stats (15 AD and 175 HP) and also an increased of movement speed after an auto attack to stick close to your enemies whilst doing your combo.
 Phage
Phage
If Ahead
-
![Caulfield's Warhammer]() Caulfield's Warhammer
. Get this if you got a lead from your opponent (if you kill him/her) and you can really torture your opponent with the additional 25 AD and 10+ Ability Haste.
Caulfield's Warhammer
. Get this if you got a lead from your opponent (if you kill him/her) and you can really torture your opponent with the additional 25 AD and 10+ Ability Haste.
 Caulfield's Warhammer
If Behind
-
![Kindlegem]() Kindlegem
. The Ability Haste and health is a very useful addition if you got killed. This allows you to cast more skills at a shorter time (use your E more often if getting bullied) and it builds to
Kindlegem
. The Ability Haste and health is a very useful addition if you got killed. This allows you to cast more skills at a shorter time (use your E more often if getting bullied) and it builds to
![Black Cleaver]() Black Cleaver
anyways.
Black Cleaver
anyways.
 Kindlegem
 Black Cleaver
Core Items:
-
![Black Cleaver]() Black Cleaver
. This can never go wrong as a first core item. This allows you to shred 6% armor per hit (abilities included) and capping at 24%. This means that as you hit more, the squishier they get and it's a god bless for Riven for her R execution. It's a safe bet even against tanks as it shreds their armor.
Black Cleaver
. This can never go wrong as a first core item. This allows you to shred 6% armor per hit (abilities included) and capping at 24%. This means that as you hit more, the squishier they get and it's a god bless for Riven for her R execution. It's a safe bet even against tanks as it shreds their armor. -
![Death's Dance]() Death's Dance
. The reason why this is a must buy in all builds is because it mitigates 30% of damage taken, and converts it to DoT. As Riven, your main role is to cause havoc and possibly destroy their squishy damage dealers. The sustain that this item gives can't be overlooked.
Death's Dance
. The reason why this is a must buy in all builds is because it mitigates 30% of damage taken, and converts it to DoT. As Riven, your main role is to cause havoc and possibly destroy their squishy damage dealers. The sustain that this item gives can't be overlooked. -
![Guardian Angel]() Guardian Angel
. People tend to go
Guardian Angel
. People tend to go
![Sterak's Gage]() Sterak's Gage
after
Sterak's Gage
after
![Death's Dance]() Death's Dance
and that's completely ok, but I personally like to go on a more safer route. As we're mid game by the time you get this item, skirmishes happen a lot, and by having
Death's Dance
and that's completely ok, but I personally like to go on a more safer route. As we're mid game by the time you get this item, skirmishes happen a lot, and by having
![Guardian Angel]() Guardian Angel
, it gives you a sense of confidence to bombard them with your insane damage. Although this can be a double edged sword and is more of a personal preference.
Guardian Angel
, it gives you a sense of confidence to bombard them with your insane damage. Although this can be a double edged sword and is more of a personal preference. -
![Sterak's Gage]() Sterak's Gage
. This item turns you from beast to a monster. It gives 400+ HP and 50% base AD. The lifeline passive helps against burst champions (
Sterak's Gage
. This item turns you from beast to a monster. It gives 400+ HP and 50% base AD. The lifeline passive helps against burst champions (
![Zed]() Zed
etc.) with the tremendous shield.
Zed
etc.) with the tremendous shield.
 Death's Dance
 Guardian Angel
 Sterak's Gage
 Zed
Zed
Final Items:
-
![Randuin's Omen]() Randuin's Omen
. Amazing item when facing strong ADC's and Yasuo and the reduce of their attack speed and movement speed is a direct counter to critical attack champions.
Randuin's Omen
. Amazing item when facing strong ADC's and Yasuo and the reduce of their attack speed and movement speed is a direct counter to critical attack champions. -
![Maw of Malmortius]() Maw of Malmortius
. Get this if you're against an AP heavy team. The lifeline passive gives you a magical shield instead, but one thing to look out for is the lifegrip passive which gives you 30 attack damage and 10% physical vamp as a last resort to fight your way out.
Maw of Malmortius
. Get this if you're against an AP heavy team. The lifeline passive gives you a magical shield instead, but one thing to look out for is the lifegrip passive which gives you 30 attack damage and 10% physical vamp as a last resort to fight your way out. -
![Mortal Reminder]() Mortal Reminder
. Usually I would get this as the last item in any matchup. The 30% armor penetration is the cherry on top for late game and it also applies grievous wounds, which is beneficial for the high sustaining tanks ([Dr.Mundo]).
Mortal Reminder
. Usually I would get this as the last item in any matchup. The 30% armor penetration is the cherry on top for late game and it also applies grievous wounds, which is beneficial for the high sustaining tanks ([Dr.Mundo]).
 Randuin's Omen
 Maw of Malmortius
 Mortal Reminder
Lethality Items:
You can go Lethality if you decide to take
 Riven
mid, although I don't really recommend for those who haven't played
Riven
at least 100 games. Lethality lets you pop a person in one second IF DONE RIGHT.
Riven
mid, although I don't really recommend for those who haven't played
Riven
at least 100 games. Lethality lets you pop a person in one second IF DONE RIGHT.
-
![Youmuu's Ghostblade]() Youmuu's Ghostblade
. This is the first item to your "assassin" build. It gives AD, flat armor penetration and ability haste. What you should look for is the extra movement speed upon reaching 100 stacks. It is paramount to get this item first if you're playing Riven mid so you can gank much faster.
Youmuu's Ghostblade
. This is the first item to your "assassin" build. It gives AD, flat armor penetration and ability haste. What you should look for is the extra movement speed upon reaching 100 stacks. It is paramount to get this item first if you're playing Riven mid so you can gank much faster. -
![Duskblade of Draktharr]() Duskblade of Draktharr
. Similar to
Duskblade of Draktharr
. Similar to
![Youmuu's Ghostblade]() Youmuu's Ghostblade
but the nightstalker passive give you the extra OOMPH to your damage, and usually, it doesn't allow the squishies to retaliate at all.
Youmuu's Ghostblade
but the nightstalker passive give you the extra OOMPH to your damage, and usually, it doesn't allow the squishies to retaliate at all. -
![Umbral Glaive]() Umbral Glaive
. This item gets overlooked A LOT. Why I find it important for assassin build is because you want to play as an ambusher, and you can't ambush if you stand on top of the ward. This item gives you ward detection, whilst letting you keep the ward trinket.
Umbral Glaive
. This item gets overlooked A LOT. Why I find it important for assassin build is because you want to play as an ambusher, and you can't ambush if you stand on top of the ward. This item gives you ward detection, whilst letting you keep the ward trinket.
 Youmuu's Ghostblade
 Duskblade of Draktharr
 Umbral Glaive
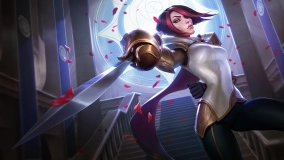
Riven Runes
Best Runes for Riven


Standard Runes set for
Riven
.
![]() Conqueror
gives her more damage the more damage she deals. This sounds redundant but this is the key factor for her playstyle, especially as it increases her execution damage of her ult.
Conqueror
gives her more damage the more damage she deals. This sounds redundant but this is the key factor for her playstyle, especially as it increases her execution damage of her ult.
![]() Triumph
gives an additional boost to her execution and also gives HP after killing an enemy. I personally love bone plating because it lets me go ham yet not take that much damage from the enemy, always giving me an advantage for future trades.
Triumph
gives an additional boost to her execution and also gives HP after killing an enemy. I personally love bone plating because it lets me go ham yet not take that much damage from the enemy, always giving me an advantage for future trades.
![]() Hunter Genius
is just for the sake of Ability haste, that and the other runes are not so useful.
Hunter Genius
is just for the sake of Ability haste, that and the other runes are not so useful.


The Assassin Runes changes
![]() Conqueror
with
Conqueror
with
![]() Electrocute
as we do 3 consecutive attacks relatively fast. We take
Electrocute
as we do 3 consecutive attacks relatively fast. We take
![]() Triumph
and
Triumph
and
![]() Bone Plating
because they're awesome and take
Bone Plating
because they're awesome and take
![]() Pathfinder
to roam around and ambush better. Although Pathfinder is a personal preference, you guys can continue to take
Pathfinder
to roam around and ambush better. Although Pathfinder is a personal preference, you guys can continue to take
![]() Hunter Genius
to see what suits you.
Hunter Genius
to see what suits you.
Skill Order
How to distribute skill points


Summoner Spells
When to take which summoners


Combos
Learn how to maximize the champions potential


Level 2 All In Combo
You would be surprised on the insane amount of damage
Riven
can dish out at level 2. She's practically the only champion that has 4 ability usage in the whole game at level 2, and with this, no other champion can retaliate.
This can net you a first blood even against
 Darius
if done right. But you have to do this combo in rapid succession. The
Darius
if done right. But you have to do this combo in rapid succession. The
 Valor
after the auto attack is to cancel the AA animation and block any retaliation damage. The rapid 2
Valor
after the auto attack is to cancel the AA animation and block any retaliation damage. The rapid 2
 Broken Wings
is to knock up.
Broken Wings
is to knock up.

All In combo before 6:
Rapid 2 [Broken Wings] to close the gap and deal some damage then sneak an AA. After the AA, use [riven:2] to cancel the AA animation and 3rd
Broken Wings
to CC the enemy some more.
Valor
away in case the enemy attacks back. They will not be able to deal much damage to you as you CC'd them twice and
Valor
away to safety.
Rapid Combo:
Valor
in to close the gap and give some armor, and
 Ki Burst
-> AA to deal some quick damage. Once you're next to them, double
Broken Wings
to safety and the enemy won't even get a hit on to you.
Ki Burst
-> AA to deal some quick damage. Once you're next to them, double
Broken Wings
to safety and the enemy won't even get a hit on to you.
Super Safe Poke:
Do this if you're against a foe that's already ahead and want to whittle down their health.

All in Combo Post 6:
This is the "Sure Death" combo. You
Valor
first to get in range then Ult AND
Ki Burst
straight after. This is because the ult animation gets cancelled by
Ki Burst
and they also get stunned and proceed with an AA and
Broken Wings
your way through. Make sure you can fit in some AA to maximize damage, but sometimes you don't even need to and just
 Blade Of The Exile
the 2nd time after your 3rd
Broken Wings
Blade Of The Exile
the 2nd time after your 3rd
Broken Wings
Riven Matchups & Counters
Detailed information on how to play matchups and counters

Honestly, just go ham on this guy after he misses his cleaver, but don't overstay the fight because his [dr.mundo:3] can hurt you. Be sure to buy grievous wounds so level 5 won't be a big issue and you can still kill him.
 Seismic Shard
 Unstoppable Force
 Alpha Strike
 Meditate
 Apprehend
 Decimate
 Crescent Strike
 Pale Cascade
 Five Point Strike
 Justice Punch
 Garen
Garen
 Courage
 Counter Strike
 Safeguard
 Sonic Wave / Resonating Strike
 Fiora
Fiora
 Riposte
 Thundering Shuriken
 Barrel Roll
 Olaf
Olaf
 Ruthless Predator
 Condemn
 Irelia
 Bladesurge
 Defiant Dance
 Camille
 Hookshot
 Tactical Sweep
 Comet Spear
 Aegis Assault
 Steel Tempest
 Wind Wall
Early Game
You would be surprised that at level 1, Riven is a force to be reckoned with, because she has 3 usage of an ability if you have
Broken Wings
and all of the champions don't have that. So a tip I would suggest is get to your lane as soon as possible and hide at the bush closest to their tower. Once you see the enemy passing you, go all ham with your
Broken Wings
and make sure to sneak AA during the process. You will most likely burn a flash, especially if you are against a squishy opponent.
That's a sweet cheese tactic, but now let's talk about what to do from levels 2-5.
I would usually put a point on
Valor
just because most match-ups would have some sort of poke/retaliation at that level and we need to mitigate some damage to keep you healthy, and the enemy frustrated. If you're against opponents that can poke you from a distance, that's more the benefit to having
Valor
rather than
Ki Burst
. In a very rare case you will put a point at
Ki Burst
at level 2, usually these would be super easy match-ups like
 Nasus
or [dr.mundo].
Nasus
or [dr.mundo].
I'd say
Riven
has the strongest level 3 power spikes than most champs, that's if the enemy allows you to reach them. People have this innate fear when facing
Riven
and they will try to read on what you're going to do next. If they were already struggling since level 2, they might already call for a jungler to help and that's what you need to be wary. Riven players I see (especially since she's pretty new) would be over confident and go in for the kill, only to have the enemy jungler to lurk in the bushes and get the kill on them.
If you are pushing on to the enemy's half, it's best that you roam around to ward and perhaps help your jungler to secure scuttle. I would usually gank mid just to burn a flash depending on the enemy mid laners position. Vision wins games guys.
If you successfully freeze the wave (which is quite hard in Wild Rift than it is in PC), then you wait until the enemy dares to go for a last hit and you punish them severely, or call the jungler.
At level 5, that's where you have an insane kill pressure. Your [riven:ult] serves as a buff, and an execution, which means you shouldn't shy away in going for the kill. Sometimes, although I really don't recommend, you can even win a 2v1 with your ult, but that is based on the skills of your enemies for that to happen. Usually by level 5, dragon would be up by then and I really recommend you try secure dragon as
Riven
is a monster at teamfights.
Mid - Late Game
I'd include mid and late game together because Wild Rift is quite congested in terms of gameplay rather than the PC version, and also, the gameplay is very similar except for different priorities (baron, elder drake etc.).
Post level 9, I would rather split push to grab that solo xp and gold, and if you are ahead, the enemies will fear you but will be forced to intercept you, because if they don't then that's another tower gone. Although Riven is pretty slippery, you will still need flash to be extra secure in escaping, or you could turn things around by [flash]ing to the enemy carry and completely 100-0 the fool. It's all a matter of your own game sense:
Can you kill the carry and survive? Or will you die along the process? If you die, would it be a heavy burden on your team?
Teamfights with
Riven
is pretty... tricky. You have to analyze the situation really quickly to make sure that you don't jump in the middle of the battlefield, get stunned, and get obliterated before doing anything. Playing
Riven
in teamfights is like playing
 Master Yi
, you just have to wait for the right moment to jump in and cause havoc. For example: If there is an
Master Yi
, you just have to wait for the right moment to jump in and cause havoc. For example: If there is an
 Amumu
, you really have to step back and reposition, because if you get caught in his [amumu:ult] it's over before you can even slash at someone. But once you see that he's used it, that's an optimal time to jump in and cause havoc.
Amumu
, you really have to step back and reposition, because if you get caught in his [amumu:ult] it's over before you can even slash at someone. But once you see that he's used it, that's an optimal time to jump in and cause havoc.
Next up is target priority. Make sure you jump on their squishier pieces to decline their teams strength exponentially, this could be targeting a super squishy
 Teemo
rather than
Teemo
rather than
 Aurelion Sol
just because you have the damage. Target priority isn't only about which target to pick out, it's also which target is the easiest to reach. For example;
Aurelion Sol
just because you have the damage. Target priority isn't only about which target to pick out, it's also which target is the easiest to reach. For example;
-if there is a
 Sona
right in front of you, but the
Sona
right in front of you, but the
 Jhin
is behind a wall of literal tanks, do you barge in to get to
Jhin
or would you get that lost and lonely
Sona
that happens to be in front of you? That's right, you get the
Sona
.
Riven
can obliterate people in almost an instant, but she can be obliterated herself. So be very careful.
Jhin
is behind a wall of literal tanks, do you barge in to get to
Jhin
or would you get that lost and lonely
Sona
that happens to be in front of you? That's right, you get the
Sona
.
Riven
can obliterate people in almost an instant, but she can be obliterated herself. So be very careful.

