[2.5a] Perish's Complete Ms. Baguette Fiora Guide
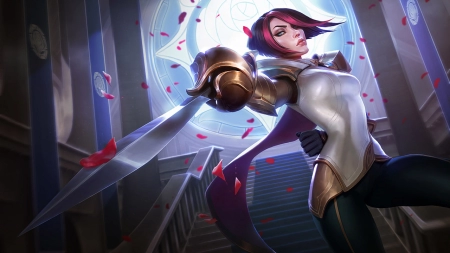


Perish's Complete Ms. Baguette Fiora Guide
Pros
- Can Solo Carry Games once MASTERED
- Good at 1v1 - 1v2 - 1v3
- BEST Split Pusher in the game
- Not much counters
- High Skill Ceiling
- Scales
Cons
- Takes time and effort experience
- limited item archetype in the current patch
- not good in team fights
- BAD Against AP Heavy COMPs in Late Game
- Hard to comeback once behind
- Needs to understand matchups very well
Fiora Build
Best Build Guide for Fiora


Item Build Description
Additional information on the items
Starting items:
For every matchup i would highly suggest getting
 Long Sword
as a Starting Item because you want the extra AD to dominate lane and it helps as it opens more opportunities
Long Sword
as a Starting Item because you want the extra AD to dominate lane and it helps as it opens more opportunities
For early all-ins or a level 2 cheese or a aggressive Mid roam (In certain matchups that are weaker than you) you want to harass with
 Lunge
and make sure you Proc / Hit the
Lunge
and make sure you Proc / Hit the
 Duelist's Dance
Core items:
 Trinity Force
,
Trinity Force
,
 Youmuu's Ghostblade
,
Youmuu's Ghostblade
,
 Death's Dance
(The rest are depending on the matchup) *You could also substitute
Youmuu's Ghostblade
for [Blade of the Ruined King] if youre focusing on Lifesteal* but Youmuus is better for Tank matchups or squishys (AD Carries)
Death's Dance
(The rest are depending on the matchup) *You could also substitute
Youmuu's Ghostblade
for [Blade of the Ruined King] if youre focusing on Lifesteal* but Youmuus is better for Tank matchups or squishys (AD Carries)
Trinity Force
is a MUST on Fiora as it helps Fiora while in the Laning Phase
Personally, i use
Youmuu's Ghostblade
as a second item because it really helps to burst down Tanks and enemies Quicker
Tanks are common in Baron Lane, [Fiora:passive] does a great job on countering Tanks as it scales [TRUE DAMAGE] however, her passive is easily countered by
 Thornmail
&
 Mortal Reminder
so be aware of the enemy's build
Mortal Reminder
so be aware of the enemy's build
Some people might say WHY
 Duskblade of Draktharr
? well, to put it simply
Duskblade of Draktharr
meshes well with
Youmuu's Ghostblade
and is really useful to burst Tankier champions but can also be used for bursting enemy squishy's
Duskblade of Draktharr
? well, to put it simply
Duskblade of Draktharr
meshes well with
Youmuu's Ghostblade
and is really useful to burst Tankier champions but can also be used for bursting enemy squishy's
As you may know by now
 Sterak's Gage
has a Passive called Lifeline which grants you extra health and a shield of some type to avoid getting bursted by Assasins
Sterak's Gage
has a Passive called Lifeline which grants you extra health and a shield of some type to avoid getting bursted by Assasins
effects only apply if youre below 35% Health
if the enemy team has a lot of AP champions, use
 Maw of Malmortius
,
Sterak's Gage
, and
Maw of Malmortius
,
Sterak's Gage
, and
 Mercury's Treads
The
 Manamune
/
Manamune
/
 Muramana
should only be used if the enemy team's comp has full AD
Muramana
should only be used if the enemy team's comp has full AD
Buy
 Teleport Enchant
if you want to go Split Pushing
Teleport Enchant
if you want to go Split Pushing
And it only should be used for Split Pushing OR TP'ing to a Team fight
Remember that each Builds has its strength and weaknesses, so tryout what works for you because not all players has the same playstyle
Good Luck on your rank games!
Fiora Runes
Best Runes for Fiora


- Use this rune set if you want to have good early game damage, and better splitpushing
*IF youre uncomfortable on using Mastermind yet and still a beginner use![Manaflow Band]() Manaflow Band
*
Manaflow Band
*
*IF youre againts a AP heavy comp, use![Hunter Titan]() Hunter Titan
*
Hunter Titan
*
*IF you think the game is going to go on longer (above 23+ minutes) use![Gathering Storm]() Gathering Storm
*
Gathering Storm
*
*IF you want to stay in lane longer, use![Sweet Tooth]() Sweet Tooth
*
Sweet Tooth
*
*IF youre againts a Melee AD Heavy comp or you are laning againts a melee champion like![Garen]() Garen
,
Garen
,
![Darius]() Darius
,
Darius
,
![Singed]() Singed
, Etc, use
Singed
, Etc, use
![Second Wind]() Second Wind
*
Second Wind
*
*IF you just want to get reduced damage, use![Bone Plating]() Bone Plating
*
Bone Plating
*
*KEYSTONE RUNES CAN BE CHANGED BASED ON PERSONAL PREFERENCE*
Use this rune set if you want to sustain better in lane
*IF youre uncomfortable on using Mastermind yet and still a beginner use
![]() Manaflow Band
*
Manaflow Band
*
*IF youre againts a AP heavy comp, use
![]() Hunter Titan
*
Hunter Titan
*
*IF you think the game is going to go on longer (above 23+ minutes) use
![]() Gathering Storm
*
Gathering Storm
*
*IF you want to stay in lane longer, use
![]() Sweet Tooth
*
Sweet Tooth
*
*IF youre againts a Melee AD Heavy comp or you are laning againts a melee champion like
 Garen
,
Garen
,
 Darius
,
Darius
,
 Singed
, Etc, use
Singed
, Etc, use
![]() Second Wind
*
Second Wind
*
*IF you just want to get reduced damage, use
![]() Bone Plating
*
Bone Plating
*
*KEYSTONE RUNES CAN BE CHANGED BASED ON PERSONAL PREFERENCE*
Use this rune set if youre againts a hard matchup
*DONT USE THIS RUNE SET IF YOURE AGAINTS A RANGED CHAMPION*
*IF youre uncomfortable on using Mastermind yet and still a beginner use
![]() Manaflow Band
*
Manaflow Band
*
*IF youre againts a AP heavy comp, use
![]() Hunter Titan
*
Hunter Titan
*
*IF you think the game is going to go on longer (above 23+ minutes) use
![]() Gathering Storm
*
Gathering Storm
*
*IF you want to stay in lane longer, use
![]() Sweet Tooth
*
Sweet Tooth
*
*IF youre againts a Melee AD Heavy comp or you are laning againts a melee champion like
Garen
,
Darius
,
Singed
, Etc, use
![]() Second Wind
*
Second Wind
*
*IF you just want to get reduced damage, use
![]() Bone Plating
*
Bone Plating
*
*KEYSTONE RUNES CAN BE CHANGED BASED ON PERSONAL PREFERENCE*
Skill Order
How to distribute skill points


Summoner Spells
When to take which summoners


Combos
Learn how to maximize the champions potential


Short trading combo

Slide Parry (Hit Vitals and Dodge CC)

Use this combo when the enemy is stunned by your parry (under level 5)

Use this combo when the enemy is stunned by your parry (Level 5)
Slide Parry Combo (similar to the last combo but this one doesn't use
 Bladework
)
Bladework
)
Fiora Jungle clear
Turret Dive 1 (Under Lvl 5)
Turret Dive 2 (Under Lvl 5)
Turret dive 1 (Lvl 5)
Slide Parry turret dive *use
 Grand Challenge
before Lunge if youre above lvl 5*
Grand Challenge
before Lunge if youre above lvl 5*
Fiora Matchups & Counters
Detailed information on how to play matchups and counters


MAN TO ANGRY TOO DIE
 Tryndamere
is actually very easy to lane against under level 5 and above level 5 (depends on the game state)
Tryndamere
is actually very easy to lane against under level 5 and above level 5 (depends on the game state)
Harass him in lane as much as possible in lane before level 5 and be sure you have barrier because he crits with
 Bloodlust
and heals a lot
Bloodlust
and heals a lot
his
 Undying Rage
lasts for a decent amount of time and can be used to dive turrets so be careful
Undying Rage
lasts for a decent amount of time and can be used to dive turrets so be careful
 Jarvan Iv
 Demacian Standard
 Dragon Strike
 The Hextech Ultimatum
 Diana
Diana
 Command: Shockwave
 Crescent Strike
 Xin Zhao
 Crescent Guard
 Three Talon Strike
 Ahri
Ahri
 Charm
Charm
 Aurelion Sol
 Starsurge
 Center Of The Universe
 Celestial Expansion
 Jayce
Jayce
 Mercury Cannon / Mercury Hammer
 Thundering Blow / Acceleration Gate
 Ruthless Predator
 Reign Of Anger
 Jax
Jax
 Counter Strike
 Nimbus Strike
 Cyclone
 Malphite
 Seismic Shard
 Unstoppable Force
 Granite Shield
 Noxious Slipstream
 Mega Adhesive
 Fling
Fling
 Graves
 Smoke Screen
 Collateral Damage
 New Destiny
 Pantheon
 Aegis Assault
 Shield Vault
 Bouncing Blade
 Preparation
 Voracity
 Zed
Zed
 Razor Shuriken
 Living Shadow
 Death Mark
 Pick A Card
 Silver Bolts
 Corki
Corki
 Evelynn
 Allure
 Hate Spike
 Whiplash
 Demon Shade
 Shuriken Flip
 Assassin's Mark
 Kennen
 Mark Of The Storm
 Slicing Maelstrom
 Bladesurge
 Flawless Duet
 Body Slam
 Explosive Cask
 Last Breath
 Yasuo
Yasuo
 Broken Wings
 Ki Burst
 Olaf
Olaf
 Undertow
 Reckless Swing
 Blinding Dart
 Noxious Trap
 Decisive Strike
 Demacian Justice
 Hookshot
 Steel Tempest
 Way Of The Wanderer
 Apprehend
 Hemorrhage
 Lucian
 Orianna
 Command: Attack

Your Fiora Mindset
 Fiora
is bad at teamfighting but good at dueling, hence her title. if you want to climb with
Fiora
you need a mindset but first here are some basic fundamentals you need to know about
Fiora
:
Fiora
is bad at teamfighting but good at dueling, hence her title. if you want to climb with
Fiora
you need a mindset but first here are some basic fundamentals you need to know about
Fiora
:
Fiora
is a duelist so try to avoid getting 1v4'ed or higher, she is the best split pusher in the game so use that advantage to pressure the map and help your team get OBJs while overwhelm the enemy team with the pressure
if youre caught in a teamfight with
Fiora
what you need to do is try to go to their backline and isolate or assasinate their AD Carry, try to fight the ADC because you have lifesteal with your vitals so take advantage of with to get you team an advantage while the AD Carry's team is fighting your team you need to fight the AD Carry and ensure that your team has a chance of winning
If youre behind with
Fiora
what you need to do is roam to other lanes and help take objectives I.e Dragon, Herald, Baron, or turrets. if they destroy your turret its ok, just make sure you get OBJs and take their turret, yes this is a coinflip strategy but if executed properly it will win you games
DONT DO THIS IF YOURE AGAINST A
 Vayne
OR
Vayne
OR
 Kai'sa
, BECAUSE THEY CAN EASILY OUT ROTATE YOU
Kai'sa
, BECAUSE THEY CAN EASILY OUT ROTATE YOU
And also, dont play by your emotions, play with your Brain, Skill and Confidence
Early Game
Fiora
's Early Game is one of the best, to ensure that you win lane is you must manage your minions properly by either freezing, shoving, fast pushing, slow shove towards your turret. You dont have to do all of this in a single match as some of these are conditional and optional
Summoner Spell tracking is also important
what i mean by this is, remembering the enemy's Summoner spell I.e [Flash] [Barrier] [Ignite] and when did they last use it and for what purpose
use your [Fiora:1] to harass in lane and make sure to use it to focus on
Duelist's Dance
not only to CS
Try to get scutle or ward around the scutle to give info to both you and your jungler if the enemy jungler is taking it or not, you can also take it as it gives you 325 gold = to 1 Kill
BE MINDFUL IF YOUR TRYING TO TAKE SCUTLER AS MOST EARLY GAME SKIRMISHES HAPPENS THERE
MID GAME
By the 10 Minute mark you should already have obtained
Trinity Force
,
Youmuu's Ghostblade
and depending on your early game performance you will already have your third item, by this point if you already have a kill as
Fiora
its better to roam, but dont roam while there is a wave, you need to clear it either split push or take Objectives.
DONT FORGET TO PLACE A WARD IN YOUR LANE
i would recommend you to do this because if you use
![]() Mastermind
you will gain extra gold and exp, you also do extra damage to turrets which is very helpful if youre split pushing
Mastermind
you will gain extra gold and exp, you also do extra damage to turrets which is very helpful if youre split pushing
dont forget to collect waves in empty lanes and also go back to your lane once in a while to push and clear waves
LATE GAME
Late game starts at 15 Minutes and above, at this point youre almost done with your build as
Fiora
(depending on the state of the game) so focus on roaming but dont forget to collect waves in empty lanes to speed up you items this is where team coordination and your skill will be put to the test, coordinate with your team to get 2 [Oracle lens] and 3 players holding [Sight Ward]
IF the state of the game is stale and both teams are matched, place down ward to be use for vision and [Teleport] locations
again
Fiora
is bad at teamfights, so best thing to do is assert pressure by split pushing
COMEBACKS
if youre behind with
Fiora
best thing to do is to coordinate with your team and do coinflip roams. I am aware that this is risky but sometimes you must take risks, this usually starts at the early game and if you fall behind from there, there is still a chance at coming back. How?
Track enemy summoner spells [Flash] [Ignite] [Heal] [Barrier] and plan out your ganks
Track their jungler by warding their camps
Group together
Take opportunistic Objective Steals / takes
Punish their mistakes
BUT MOST IMPORTANTLY:
Lift your team's mentality and take control when nobody is in control
MECHANICS
Most players will say that
Fiora
is really hard mechanic to learn, but although its partially true,
Fiora
's only unique mechanic is her ability to parry damage and cc to the enemy champion through her
 Riposte
If you want to quickly get good with
Fiora
mechanics i would suggest going into training room and learn the Combos, Abilites you can parry, and what her abilities do.
If you dont want to do that as it takes some time, i would suggest watching this Video by Wickd, an ex LoL PC Pro maining Fiora
SKILL ORDER
There are different variations of skill order, both for AD and AP and i'll list them below
AD:
Lunge
Max -
Bladework
Max -
Riposte
Max (Put in
Grand Challenge
points whenever possible)
AD:
Lunge
Max -
Riposte
2 Points-
Bladework
3 Points
Grand Challenge
- Max (Max out the other Abilities after ult is maxed)
AP:
Lunge
Max - [
Riposte
Max -
Bladework
Max (Put in
Grand Challenge
points whenever possible)
AP:
Lunge
Max - [
Riposte
3 Points / Max -
Bladework
2 Points / Max -
Grand Challenge
Max / 2 Points
THERE ARE WAY MORE VARIETIES BUT I WILL ONLY COVER THE MOST EFFECTIVE AND COMMONLY USED ONES
Itemization
Fiora
has some very interesting and also simple itemization, i will help guide you to knowing what works and what doesn't work on
Fiora
To ensure that you guys can understand, i will keep this explanation simple and easy to understand.
Fiora
is a Fighter / Assassin, she excels at duels and if you're experienced and skilled she can handle upwards of 3 Champions at once.
Fiora
's items are pretty limited for now but in the future patches, i will update this guide.
ELIGIBLE ITEMS:
Trinity Force
 Blade of the Ruined King
,
Death's Dance
,
Youmuu's Ghostblade
,
Duskblade of Draktharr
,
Sterak's Gage
,
Blade of the Ruined King
,
Death's Dance
,
Youmuu's Ghostblade
,
Duskblade of Draktharr
,
Sterak's Gage
,
 Black Cleaver
,
Black Cleaver
,
 Iceborn Gauntlet
,
Iceborn Gauntlet
,
 Spirit Visage
,
Spirit Visage
,
 Randuin's Omen
,
Randuin's Omen
,
 Guardian Angel
,
Maw of Malmortius
,
Mortal Reminder
,
Guardian Angel
,
Maw of Malmortius
,
Mortal Reminder
,
 Umbral Glaive
,
Umbral Glaive
,
 Essence Reaver
,
Essence Reaver
,
 Serylda's Grudge
,
Serylda's Grudge
,
 Navori Quickblades
,
Navori Quickblades
,
 Solari Chargeblade
,
Solari Chargeblade
,
 Stormrazor
,
Stormrazor
,
 Wit's End
,
Wit's End
,
 Statikk Shiv
,
Statikk Shiv
,
 Bloodthirster
,
Manamune
,
Muramana
Bloodthirster
,
Manamune
,
Muramana
 Hextech Gunblade
,
Hextech Gunblade
,
 Rabadon's Deathcap
,
Rabadon's Deathcap
,
 Force of Nature
,
Force of Nature
,
 Frozen Heart
,
Frozen Heart
,
 Plated Steelcaps
,
Mercury's Treads
, [Gluttnous Greaves]
Plated Steelcaps
,
Mercury's Treads
, [Gluttnous Greaves]
1ST - 2ND ITEMS:
1ST
Trinity Force
,
Youmuu's Ghostblade
,
Essence Reaver
,
Manamune
2ND
Death's Dance
,
Blade of the Ruined King
,
Maw of Malmortius
,
Trinity Force
,
Youmuu's Ghostblade
,
Essence Reaver
,
Manamune
3RD - 4TH ITEMS:
3RD:
Death's Dance
,
Sterak's Gage
,
Duskblade of Draktharr
,
Serylda's Grudge
,
Wit's End
,
4TH:
Maw of Malmortius
,
Sterak's Gage
,
Guardian Angel
,
Mortal Reminder
,
Serylda's Grudge
,
Wit's End
,
5TH Items:
5TH:
Spirit Visage
,
Guardian Angel
,
Iceborn Gauntlet
, [deadman's plate]],
Frozen Heart
,
Sterak's Gage
BOOTS:
Plated Steelcaps
,
 Gluttonous Greaves
,
Mercury's Treads
,
Gluttonous Greaves
,
Mercury's Treads
,
 Ionian Boots of Lucidity
ENCHANMENTS:
Teleport Enchant
, [Stasis enchant]
Fiora
is very strong now in patch 2.4, but with the recent nerf to her max health, shes gotten pretty vulnerable and much easier to handle. one of the best top laners that can bully
Fiora
in lane is:
 Riven
,
Riven
,
 Irelia
,
Irelia
,
 Renekton
those champs with the new items has also been favored as the new patch opens up new build types to use against
Fiora
Renekton
those champs with the new items has also been favored as the new patch opens up new build types to use against
Fiora
But also keep in mind that the champs i just mentioned, some of them are weak against
Fiora
i.e
Renekton
and
Riven
in the early game, but again the new patch provided new build types and variants
*FUTURE UPDATES WHEN A NEW PATCH RELEASES*
Conclusion
It took me 6 Hours to make this so i would appreciate the like!
This Guide was inspired by Forgotten Project!
Follow me on twitter: @PerishMid
Subscribe to my YouTube Channel for Wild Rift Gameplays: PerishWR
GOOD LUCK ON YOUR RANKED GAMES!!
GLOSSARIUM OF USED TERMS
AP: Attack Power is a stat that is mostly built up by mages but could also used by fighters if they have an AP Ability in their kit
AD: Attack Damage. Is a different type of stat that is meant for damage. You see a lot of bruisers building this
Parry: its basicly a abbreviation and a name for
Fiora
's
Riposte
ability passive so if i confused you with Parry and
Riposte
its actually the same thing
Freezing: Freezing a minion wave near your turret so that you can farm safely and force your lane opponent to over extend and making them vulnerable to ganks
Proc: its a term used for if an ability, passive etc is used or activated (Abbreviation)
Diving: A term used to abbreviate a player diving an enemy champion under their turret
CS: Also an Abbreviation to a player (us) or the enemy champion killing minions, its also the short and commonly use word for Creep Score or Minion Score
Prio: Priority which means us or the enemy laner has priority which is a term to explain the jungler (Ours or theirs) or ourselves and the enemy lane priotitizing that specific lane by roaming / ganking it constantly
Split Pushing: a term used mostly as an act of asserting pressure by damaging ours or their enemy turrets by Split Pushing
TP'ing: TP is a abbreviation of Teleporting mostly use for the
Teleport Enchant
Skirmishes and Team fights: both are actually pretty much the same, difference between the two is the amount of players participating a 2v2 - 3v3 is mostly considered a SKIRMISH while a 4v4 - 5v5 is mostly considered as a Team Fight

