[2.4b] Rakan Guide - [In Depth] I need my love to hurt
[In Depth] I need my love to hurt
Pros
- One of the best engage supports when played properly.
- Great mobility and escapes.
- Shields and healing especially when built AP
- Playmaker support never boring
Cons
- Long cooldowns early
- Squishy when built full AP
- Difficult to learn and master
- Difficulty in solo q if team doesn't follow engages
Rakan Build
Best Build Guide for Rakan


Item Build Description
Additional information on the items
I normally prefer to take
 Ruby Crystal
as starting item for more health in early levels.
 Boots of Speed
are also a good first item for better move speed and faster enchant.
AP builds give stronger healing and shield but you are very squishy. if your team doesn't need a tank and needs more healing and damage go for the AP builds.
Boot options
I strongly prefer
 Ionian Boots of Lucidity
but
 Plated Steelcaps
or
 Mercury's Treads
are also viable if the enemy team is full ad or full ap/ has alot of CC.
enchantment
 Gargoyle Enchant
is my preferred go too currently, but [locket enchant] can be really good into burst comps.
 Redeeming Enchant
is always a viable options as well.
OTHER ITEMS TO CONSIDER
 Protector's Vow
can be a great item if you need to play safer on either tank or AP build. the ability haste it gives is not bad either.
 Zeke's Convergence
is another solid item for both AP or tank builds especially if the enemy team is a mix of damage. If you dont have any AP damage on your team take this over
 Abyssal Mask
 Randuin's Omen
the meta right now is crit on crit on crit so this item is also a good choice if you need to negate heavy crit damages.
 Guardian Angel
if you still yet need more armor and you need more survivability in team fights.
Remember to always look at what the enemy team and your teammates are building and adjust your build accordingly. Do not get stuck in the mind set of just building your loadout every game no matter what is going on. Matches are very fluid in nature and you need to be able to adapt to whatever situation comes up.
Rakan Runes
Best Runes for Rakan




Standard rune set. Font of life triggers easily and often with your kit.
Weakness is causes your enemies to take increased damage just for going about your normal duties in lane and in team fights.
Second wind can be replaced with
![]() Bone Plating
for reduced burst damage, or
Bone Plating
for reduced burst damage, or
![]() Hunter Titan
if you are against heavy CC.
Hunter Titan
if you are against heavy CC.
Pack hunter can be switched for
![]() Hunter Genius
for ability haste or even
Hunter Genius
for ability haste or even
![]() Pathfinder
if you want increased solo roam speed.
Pathfinder
if you want increased solo roam speed.


Aggressive rune set. Can be taken with Tank or AP builds
Second wind can be replaced with
![]() Bone Plating
for reduced burst damage, or
Bone Plating
for reduced burst damage, or
![]() Hunter Titan
if you are against heavy CC.
Hunter Titan
if you are against heavy CC.
Pack hunter can be switched for
![]() Hunter Genius
for ability haste or even
Hunter Genius
for ability haste or even
![]() Pathfinder
if you want increased solo roam speed.
Pathfinder
if you want increased solo roam speed.



Fun Rune set. Aery gives more poke in lane as well as increased shields for Allies.
Second wind can be replaced with
![]() Bone Plating
for reduced burst damage, or
Bone Plating
for reduced burst damage, or
![]() Hunter Titan
if you are against heavy CC.
Hunter Titan
if you are against heavy CC.
Pack hunter can be switched for
![]() Hunter Genius
for ability haste or even
Hunter Genius
for ability haste or even
![]() Pathfinder
if you want increased solo roam speed.
Pathfinder
if you want increased solo roam speed.
Skill Order
How to distribute skill points


Summoner Spells
When to take which summoners
Combos
Learn how to maximize the champions potential




Your standard engage combo. This lets you close the gap, shield your ally as well as heal your ally if you land your
 Gleaming Quill
and get out of the fight back to safety.


This is the standard combo but includes your ultimate for more of an All in engage. you can also throw [ignite] into the chain if you take [ignite] as a sum.


[Flash] then [Rakan:ult] to gather all enemies into an area then use
 Grand Entrance
for the knock up. Great alternate team fight engage.
Rakan Matchups & Counters
Detailed information on how to play matchups and counters
Your Grand entrance get past Braums shield as its an AOE ability.

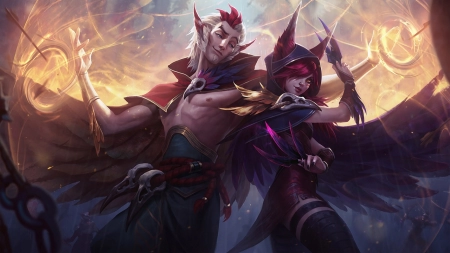
With Xayah
if you are ADC locks in
 Xayah
you get some increased stats on your abilities. you get increased shielding with
 Battle Dance
.
 Fey Feathers
allows
 Rakan
and
 Xayah
to join their recalls. when
 Xayah
begins her recall make sure and protect her till its nearly done then join the recall.

Early Game
Just as you would as a jungler in champ select and the loading screen make mental notes on how your lane should play out, and determine whether or not you believe its a lane you can snowball through or will you need to play safe and scale up to the late game. also make a note of whether or not the enemy support is a roaming support and be ready to try and match their roams if you can to support your other lanes rather than give the enemy team a free gank.
As with any engage centered support you have to play more safe in the first couple levels. level 1 I like to take
 Grand Entrance
and get quick trades as well as stop the enemy from engaging on your ADC. level 2 you can take either
 Grand Entrance
or
 Gleaming Quill
depending how the lane is going. remember to look for your Jungler in river around scuttle spawns as well as roaming to your mid laner if they need help and you have priority and can afford to leave your ADC.
If playing a
 Rod of Ages
build try and get this item ASAP as it is a scaling item. It is very easy to get this item before the first dragon spawns. Coordinate with your ADC to recall with enough time to gain priority in your lane for dragon fights, so that you can apply vision in the drake pit and clear vision in river. Changes in how the drakes and herald spawns have caused a bit of a difference in whether or not your jungler will go for the first dragon or attempt to take the herald. Keep an eye on your jungler's pathing to make sure you can rotate to assist where possible. You're not just the support for the ADC but for your team as a whole.

Mid Game
If you are able to take the first tower early make sure to keep the lane pushed while assisting the other lanes. Don't take the tower then immediately allow the enemy dragon laners to take your tower. if you can safely roam to assist other lanes this will give your ADC some good solo XP in the lane while keeping it pushed toward the tier 2 tower and beyond.
in the mid game you really need to make sure you are grouping and rotating towards where team fights will break out around objectives to be the engage for your team.
 Grand Entrance
is such a good knock up and peel in team fights that it can quickly change the tide of the fight. team fights are where your practice with aiming your
 Battle Dance
will come in handy to shield your allies that are being engaged on. after your core tank items you become quite tanky in battle and if you've built a
 Bramble Vest
item it becomes a problem for enemy melee champs.

Late Game
Late game is more of the same as mid game group with your team to be the engage and shields. keeping applying and clearing vision in the river and enemy jungle if it is safe to do so. if you are unable to group with your team stay with whoever the carry is for the team in the game. In low elo especially during the latter game farming and objective control sometimes breaks down and it becomes just an all out ARAM down mid. stay on your team to farm and pressure lanes and keep an eye on when objectives are coming up to help rotate towards those objectives.

Patch changes
Patch 2.4b
 Grand Entrance
Base damage: 70/140/210/280 → 80/150/220/290
 Battle Dance
Bonus shield amount when cast on Xayah: 200% → 125%
 The Quickness
Movement speed: 50& → 60%


 Blinding Dart
 Noxious Trap
 Absolution
 Last Embrace
 Ahri
Ahri
 Charm
Charm
 Slicing Maelstrom
 Mark Of The Storm
 Lulu
Lulu
 Whimsy

